| REVELL : CROMWELL Mk.IV
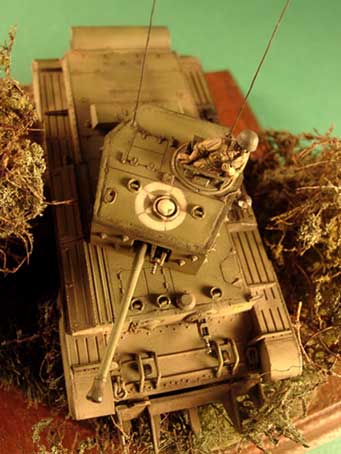
I managed to get some of my newer work online and although the pictures don't show the colours and shading correctly you get a good idea of the finished model. unfortunately in the rush to get it photographed I didn't get a shot of the full base and this will be added at a later date. The idea is of a cromwell smashing through the Normandy Bocage. BUILDING THE KIT
I built the kit straight out of the box with just minor additions, difficult to see in the photo's due to the hedge but I created a natural flow of the wheels/track as it rolled over the little hill , I also drilled out the light and added a lense from langley models railway accessories then added a little wire to the light. The only other details I added were turret hatch leather cushions from miliput and wire antenna plus of course a figure. PAINTING THE KIT
This was really my first allied kit I'd built for many years and was not really sure on the colours to aim for so I went about checking as many modelling sources as I could find. Once I had a rough idea of what I was looking for I glued the turret and hull seperately onto sticks and based coated them in a darker shade of the green I was aiming for, this was done by mixing a little black with the 2 shades of green I was using. Once this was dry I then sprayed on the shade of green I was looking for then subtely lightened it with yellow and white picking out certain areas for weathering. Finally I airbrushed a subtle dusting on the lower hull and wheels with earth brown lightening with buff and sand colours. Once dry I used a stencil set * for allied stars then added the decals I then painting small detail (tracks in grey and then highlighted in metalic shades and also picked out MG's, tools, cushions, wheels and antenna). I then gave the kit a light wash with oils burnt umber/black thinned down. The kit was added to the basework and I blended the 2 together using the airbrush then various chalk pastels. I chickened out on a drybrush as I was really happy the way it was coming along and was not sure of the result. finally I finished up by adding paint chips with a 2B pencil around hatches and places of wear, this was done very slowly. The last was to add a crew figure from Milicast Fig19 British Battle Dress* and I really went to town on him adding the wire from the headphones and microphone. BASEWORK
The base is 2 bases combined. I cut the track out with a hacksaw and used polyfila mixed with white glue to create the top layer. indents were made with the track and stones added. The base was them airbrushed shades of brown The bocage hedge was created with horsehair matting and a spongy flock on top of PVA glue, once set i then washed over with PVA glue mixed with water this change the flock from a toylike sponge into a bramble bush. I then attached it to the base. The grass is static grass and rough grass attached with white glue (all the products are found in railway modelling shops). |